Quick Start: Notes Application
This guide will show you how to create your account and build a simple application on top of TrueVault. We will create TrueNotes, an app where you will be able to log in, create secure notes that are stored in TrueVault, and list your previously created notes.
Note: This app is only supported with latest Chrome.
TrueVault Management Console Setup
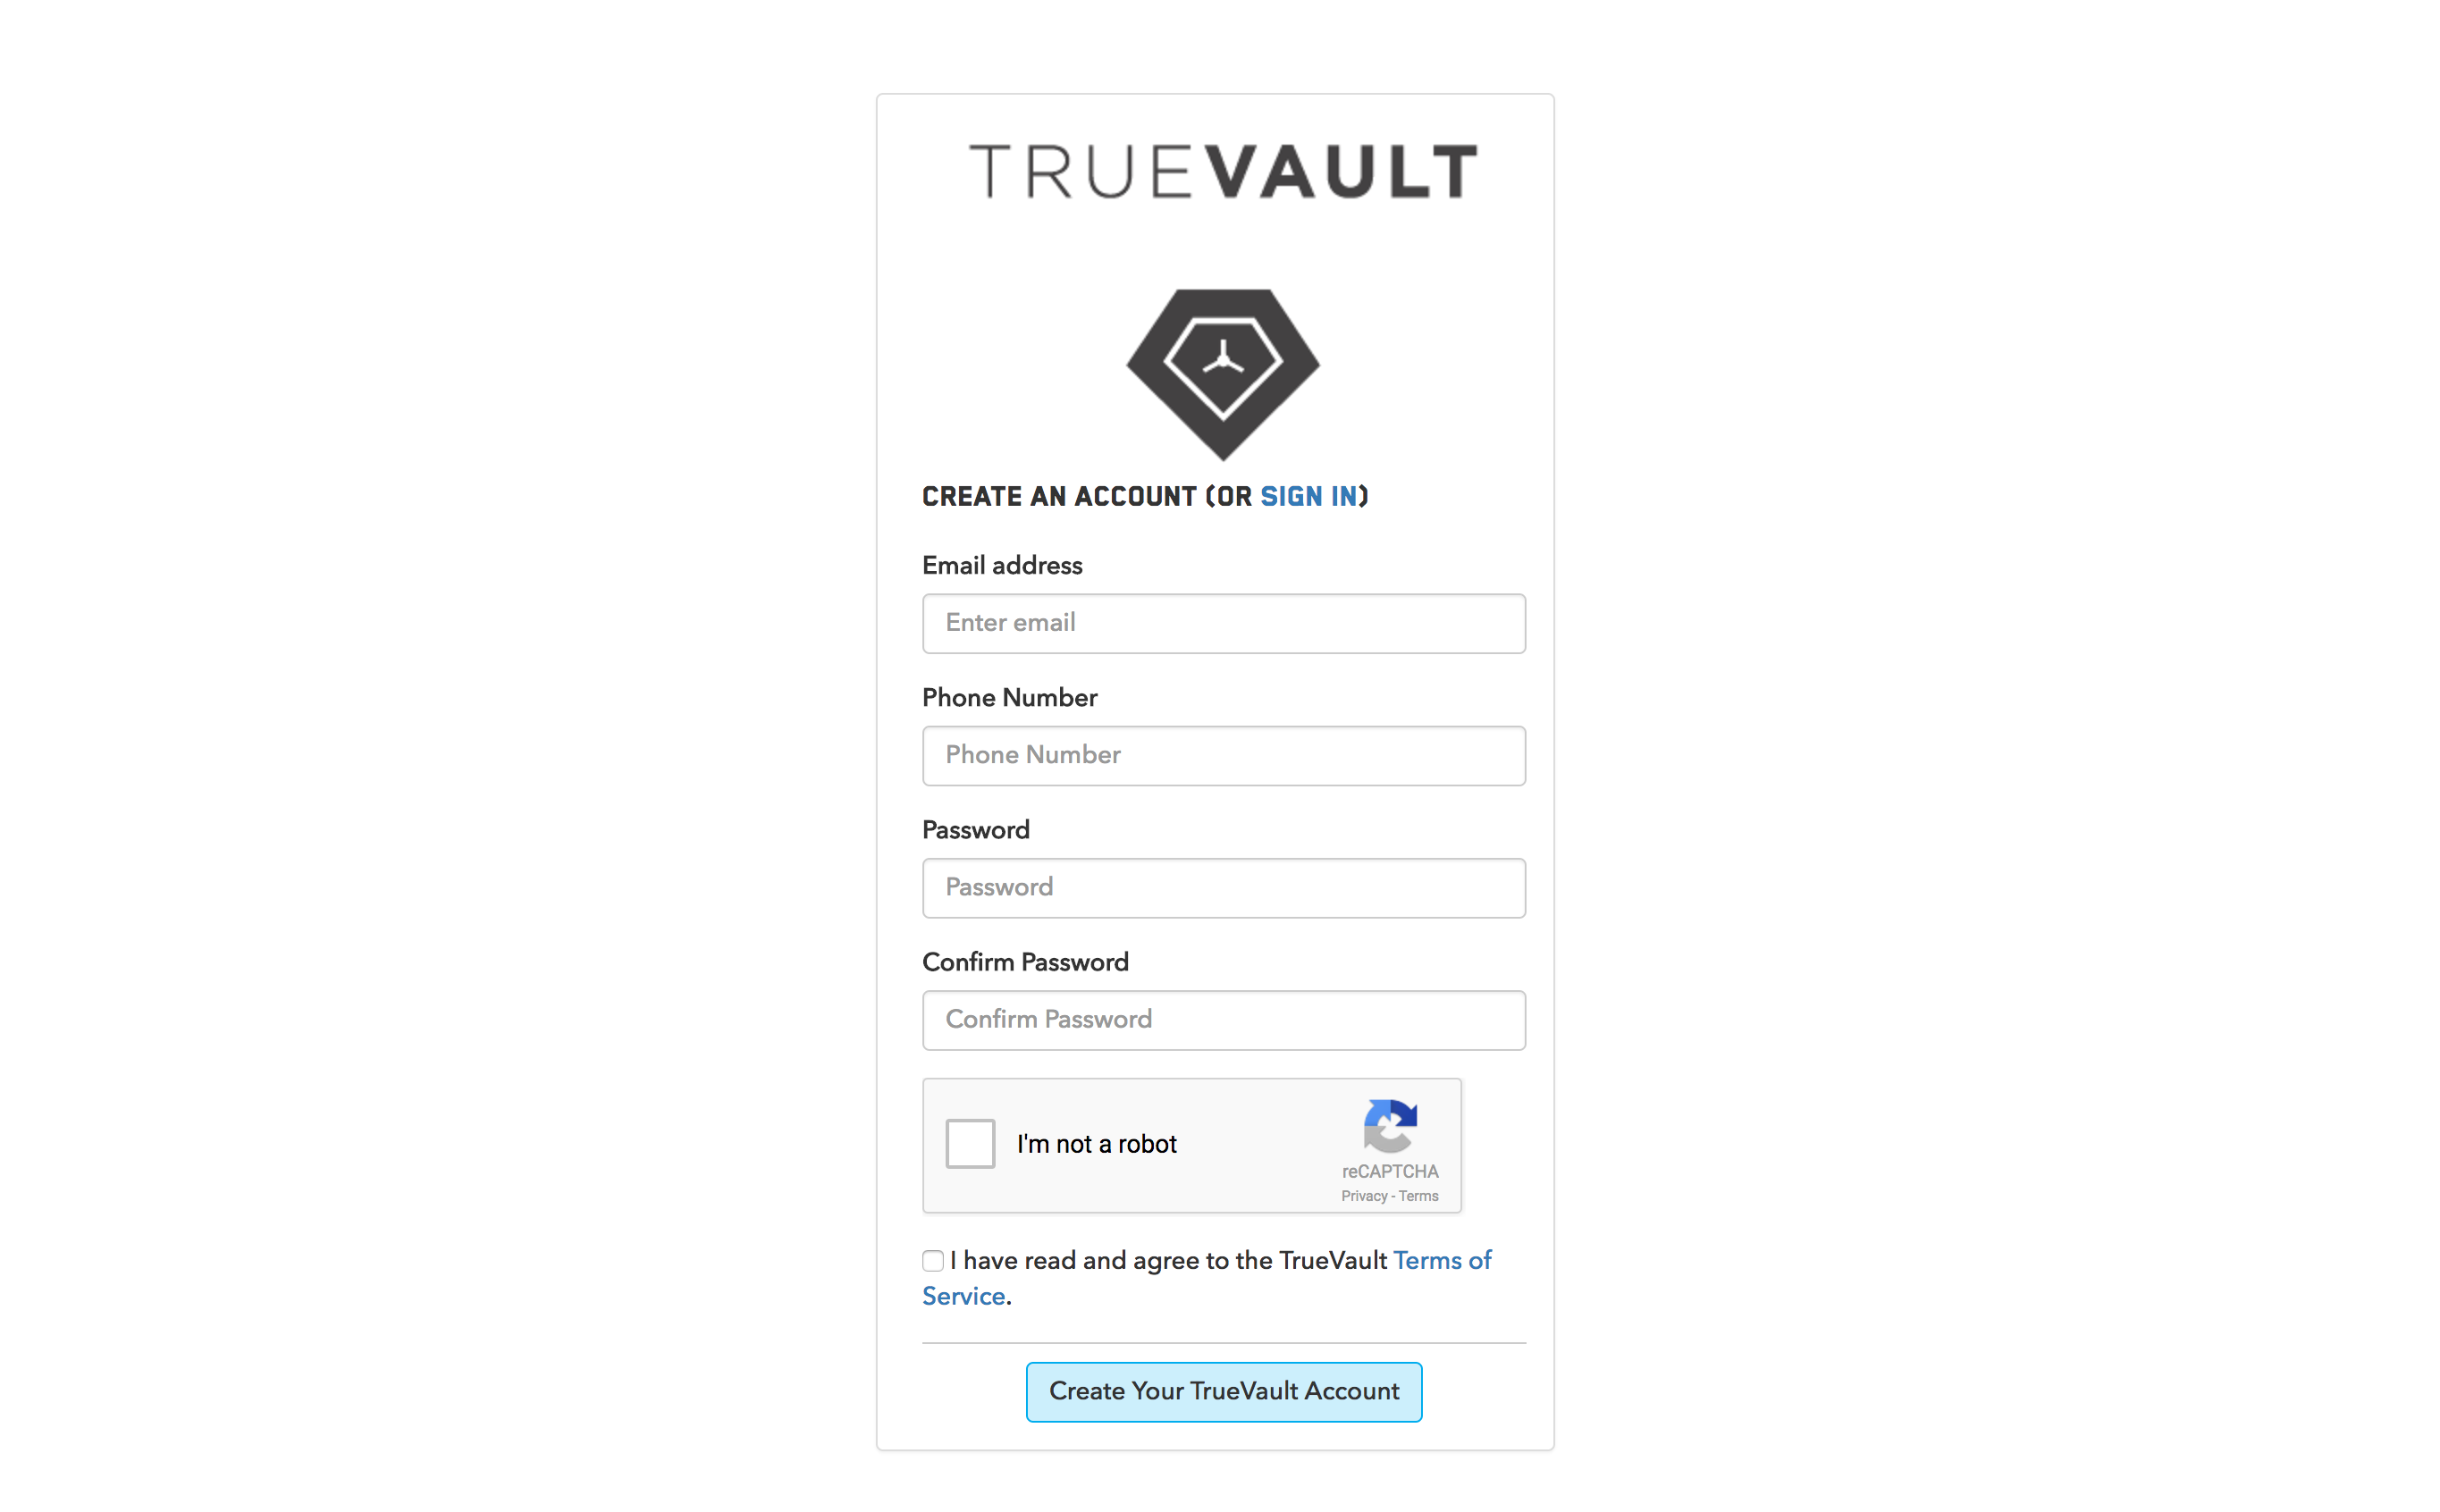
1. Create an account
First, you’ll need to create a TrueVault account.
Tip: Every account starts out as a development account which means you should not store any Protected Health Information in TrueVault until you have activated your account and you have executed a Business Associate Agreement. You can email us (help@truevault.com) for a copy of the Business Associate Agreement before you sign up.
Once you create an account you will be taken to the Management Console Dashboard.
2. Create a vault
Next, we will create a Vault to store notes. You can think of a Vault as a collection of TrueVault documents and BLOBs. Once logged in, click on the Explorer menu item on the top menu bar and then click the Create New Vault button in the bottom left. Name the Vault quickstart then click Save. Now a Vault is created and it’s ready to store any JSON or BLOB objects.

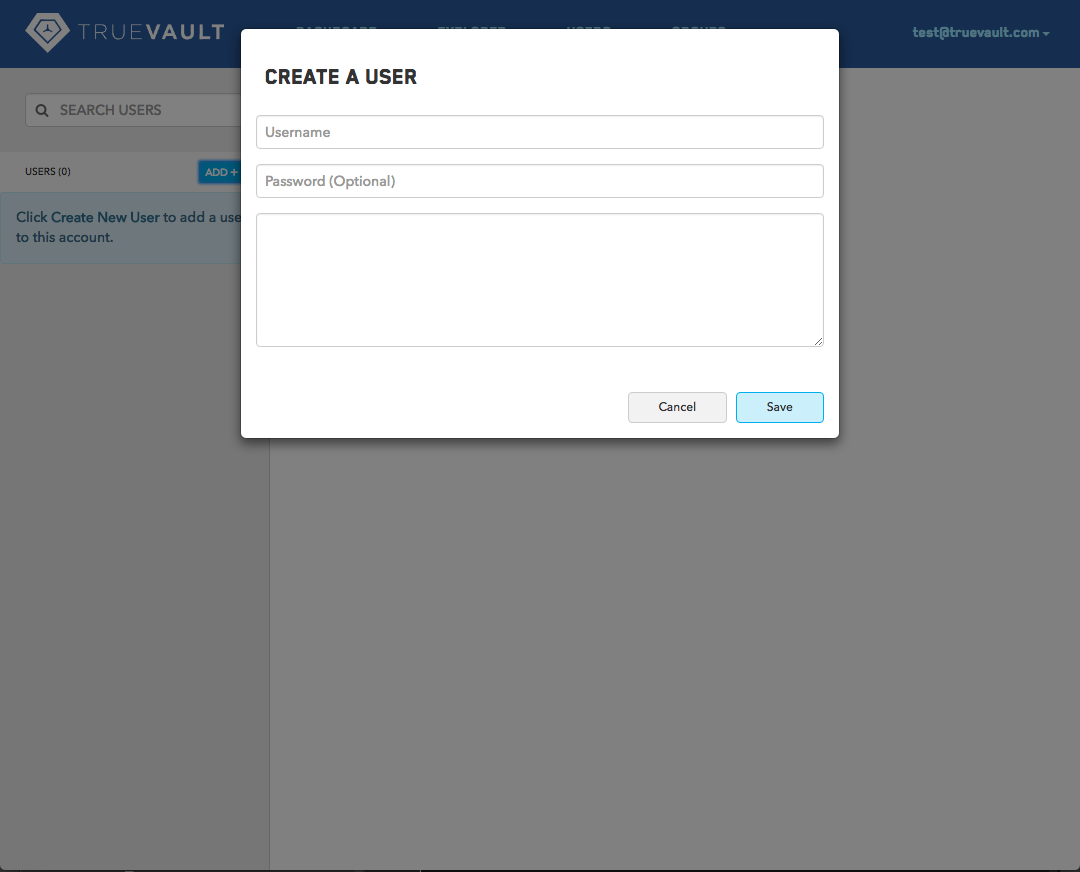
3. Create a user
Next, we need to create a user in TrueVault. This is an end-user, an actual person who will log in and create notes with the application. Click on the Users menu item on the top menu bar then click the Add + button. Name the new user quickstart with a password then click Save.
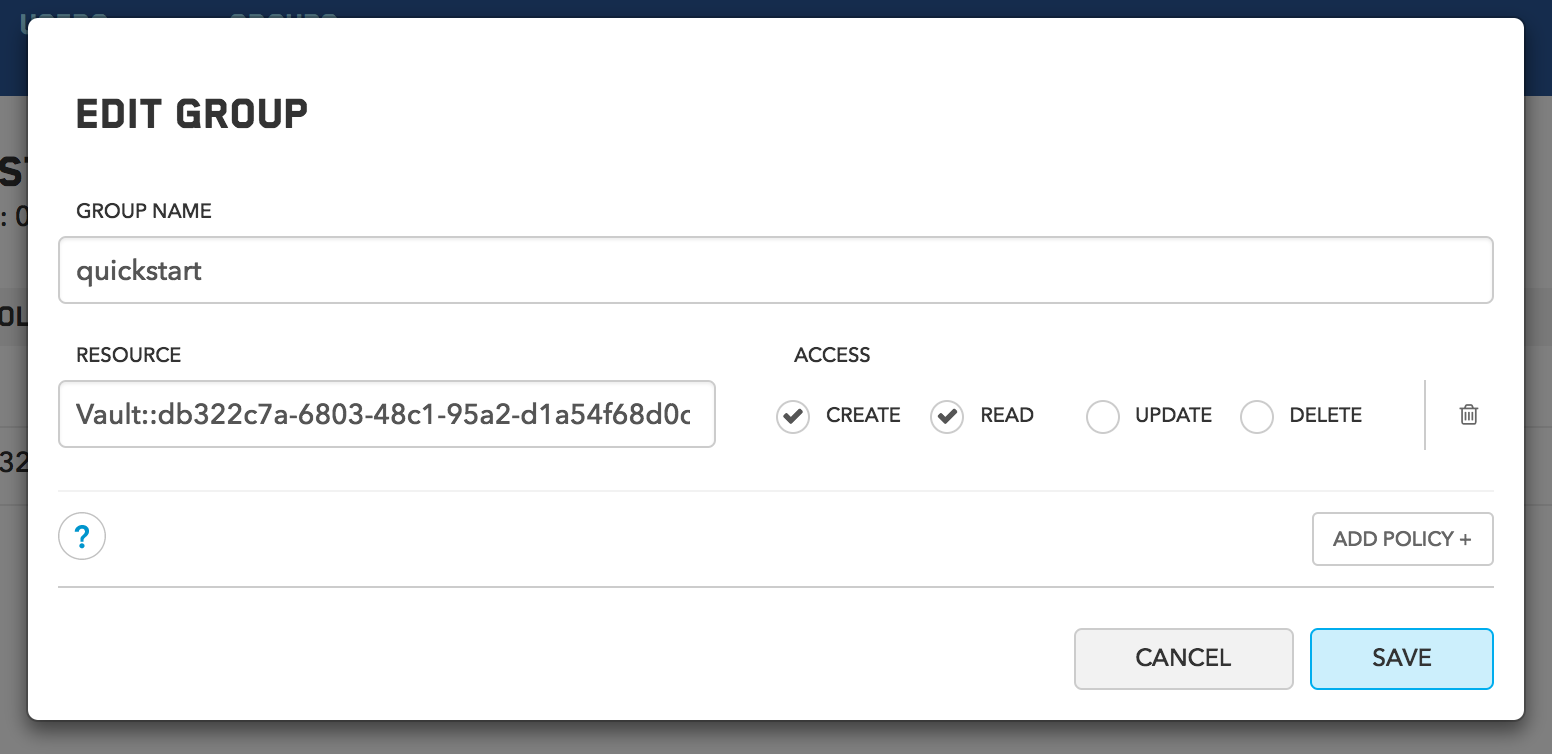
4. Create a group
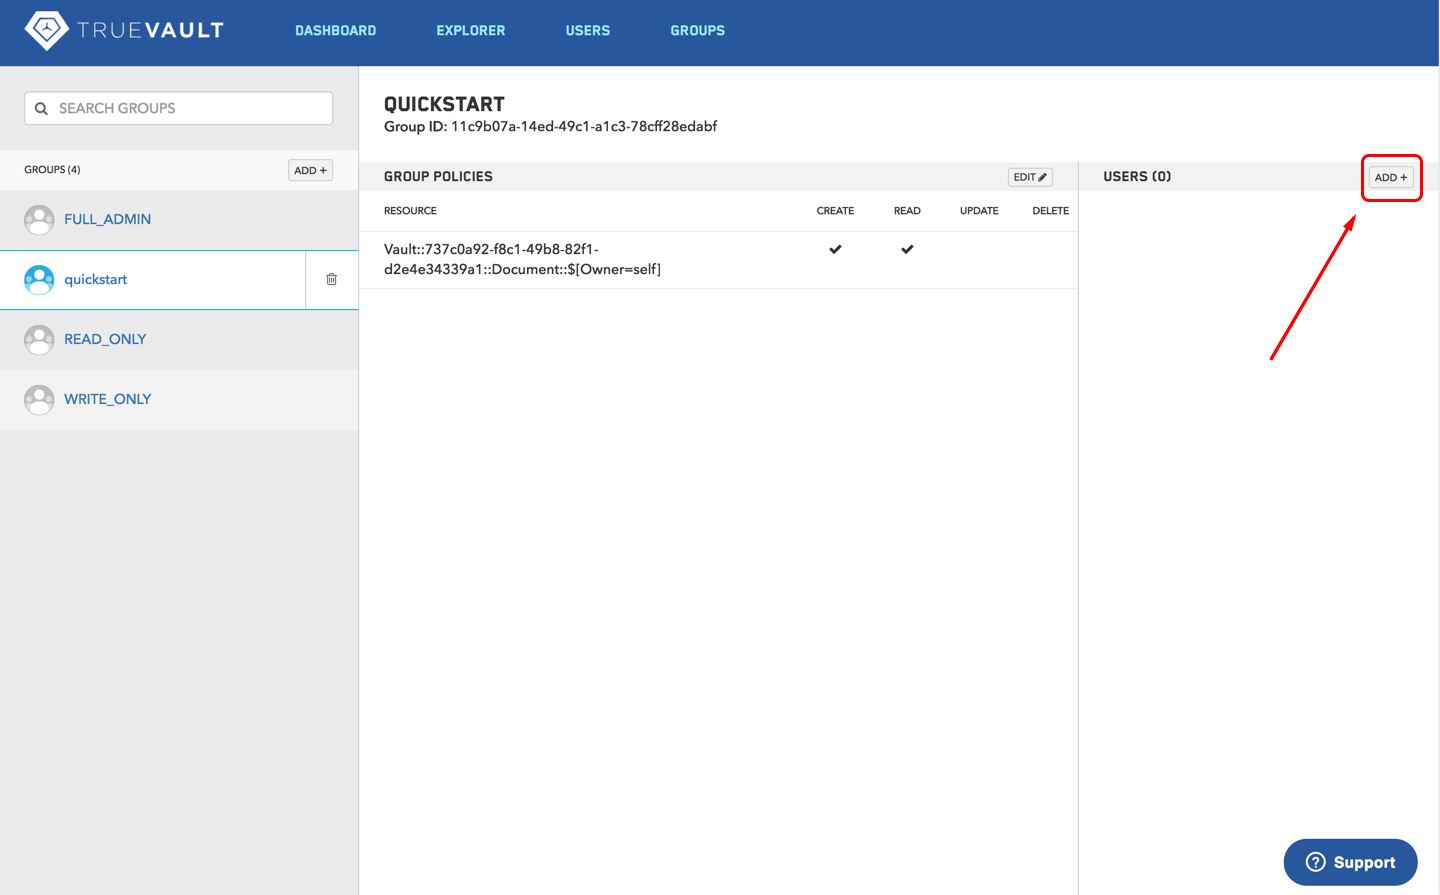
By default, Users don’t have permission to do anything in TrueVault. In order to grant Users access to data, we must first create a Group with a desired Group Policy and add the User to it.
To do so, click the Groups menu item on the top menu bar, then click the Add + button in the left sidebar. Name the group quickstart and add the policy with resource Vault::VAULT_ID::Document::$[Owner=self] (replace VAULT_ID with the ID of the Vault we created in step 2). Click the Create and Read Access buttons. Now any user in this group will be able to create documents with themselves as the owner, and read any of their owned documents within that vault.
5. Add a user to a group
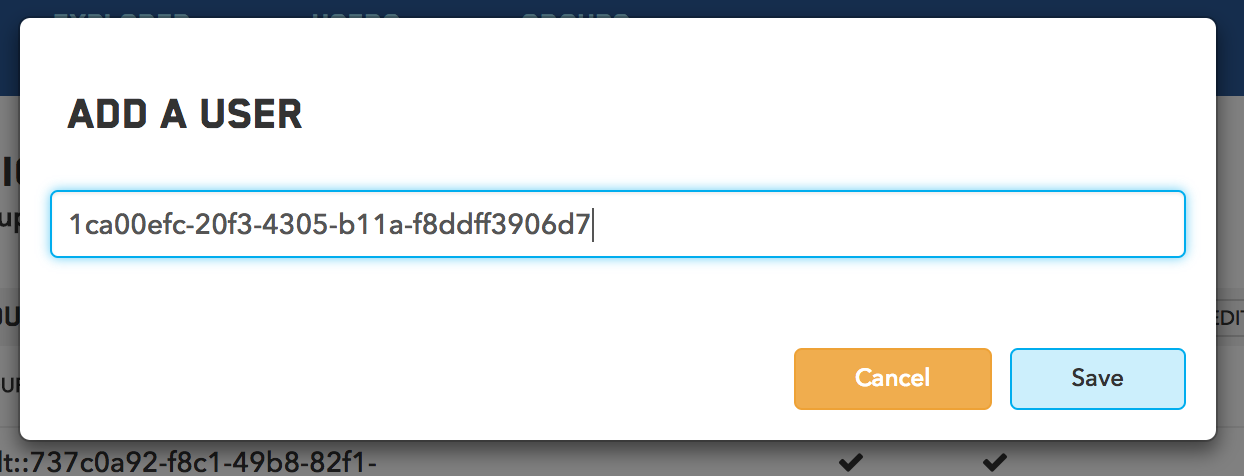
In order for the user to be granted access, we need to add it to the group we created. You can find the User’s ID by clicking on the quickstart user on the Users page and looking at the user info in the middle section.
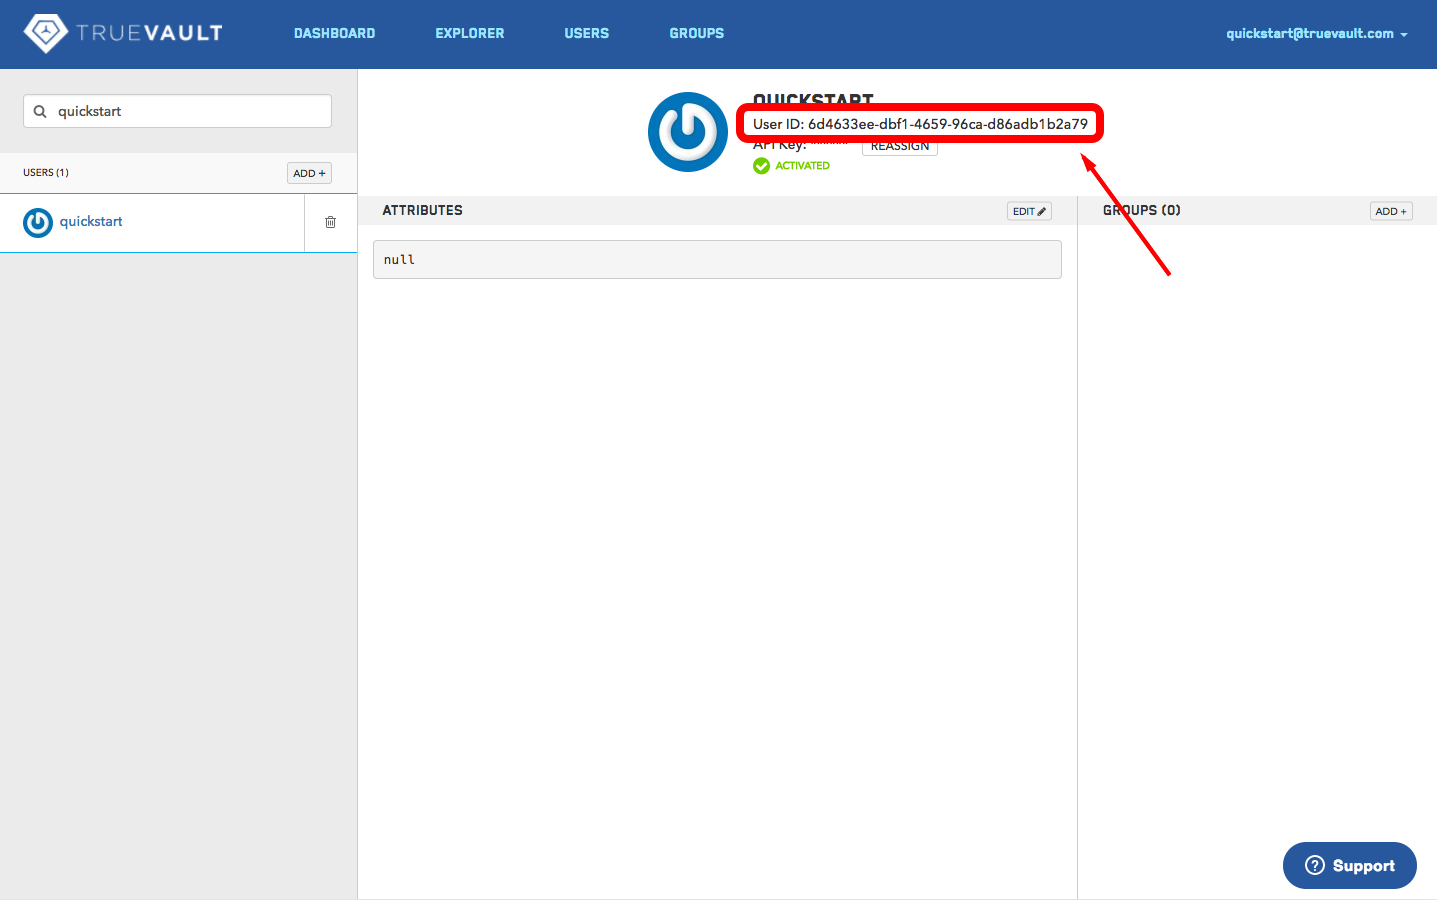
Copy that ID, navigate to the Groups page, click the quickstart group, and click the Add + button at the top of the right sidebar. Paste in the user ID and click Save to add the user to the group.
Project Setup
Now that we’ve created the necessary resources in TrueVault, it’s time to start coding. Clone the truevault-quick-start repo:
git clone https://github.com/truevault/truevault-quick-start.git
cd truevault-quick-start
The master branch contains the complete application if you want to preview what we’ll be building or reference it in case your changes diverge. Let’s begin by checking out the first commit which contains the base app skeleton:
git checkout e15a7839fe5a330faa6aeaaf6dbabec308be2a65
This skeleton only contains HTML, CSS, and Bootstrap, which we will build off of to create the full app.
Before running the app, you will need to copy the tv-config.js.template file to tv-config.js and fill in you account ID and the ID of the vault you created previously.
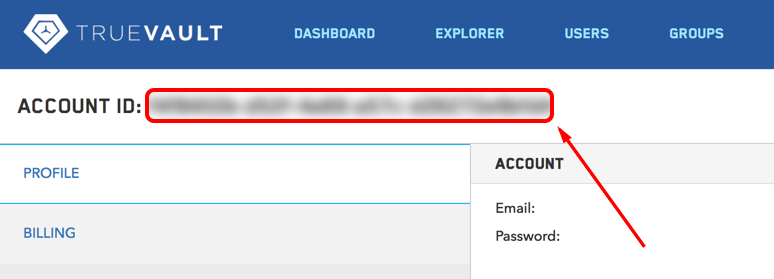
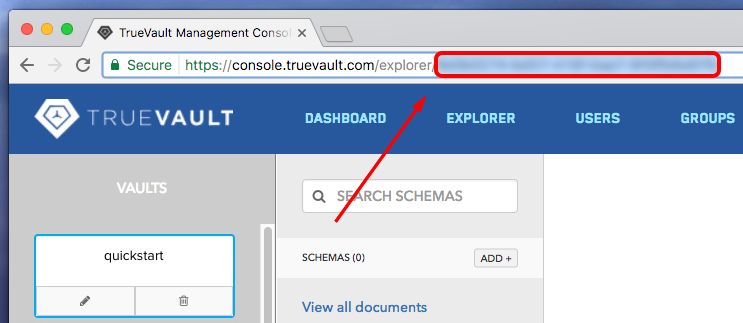
You can find your account ID by clicking your account username at the very right of the top navigation bar and clicking Account. At the top left of this account page you will see your account ID. Fill this in for TV_ACCOUNT_ID in tv-config.js.
You can find the ID of the vault you created by going clicking the Explorer button on the top navigation bar, clicking the vault in the sidebar, and copying the UUID from the URI in your browser’s navigation bar. Fill this in for TV_VAULT_ID in tv-config.js.
Running the app
You can run the app by serving the root directory. An easy way of doing this if you have python installed is by running python -m SimpleHTTPServer in the root directory and navigating to localhost:8000 in a browser. You will need to refresh the page after making any changes to the code. At this point all you should see is the top navigation bar of the TrueNotes app.
Add the TrueVault JavaScript SDK
The easiest way of interacting with TrueVault is by using the TrueVault JavaScript SDK. Let’s include this in our project by adding this script tag to the body of index.html:
<script src="https://unpkg.com/truevault@0.9.0/build/index.js"></script>
Add a login form
In order for our application to authenticate a user, we need to create a login form. This will use the login endpoint in TrueVault, with which the end user will send a username and password and receive back a user access token. This user access token will be used to make subsequent TrueVault requests.
First we’ll add some HTML and CSS to the skeleton for our login form. Add this snippet to the container div in index.html:
<div class="container">
  <form id="auth-form" class="form-horizontal">
    <div class="form-group">
      <label for="username" class="control-label">Username</label>
      <input type="text" class="form-control" id="username" name="username" placeholder="Username">
    </div>
    <div class="form-group">
      <label for="password" class="control-label">Password</label>
      <input type="password" class="form-control" id="password" name="password" placeholder="Password">
    </div>
    <div class="form-group">
      <button type="submit" class="btn btn-default" id="auth-submit">Login</button>
    </div>
  </form>
</div>
Add styling for the login form to index.css:
#auth-form {
    width: 400px;
    margin-left: auto;
    margin-right: auto;
}

.form-group{
    margin-bottom: 20px;
}

.form-horizontal .control-label {
    padding-top: 0px;
    margin-bottom: 5px;
}

.btn {
    width: 200px;
    border-radius: 100px;
    background-color: #4ba8ff;
    box-shadow: 0 2px 7px 0 rgba(0,0,0,.2);
    color: #fff;
    border: none;
    display: block;
    margin-top: 10px;
    margin-left: auto;
    margin-right: auto;
    margin-bottom: 40px;
    padding: 10px;
    padding-left: 16px;
    padding-right: 16px;
    font-size: 16px;
}

.btn:hover {
    background-color: #7ec1ff;
    color: #fff;
}
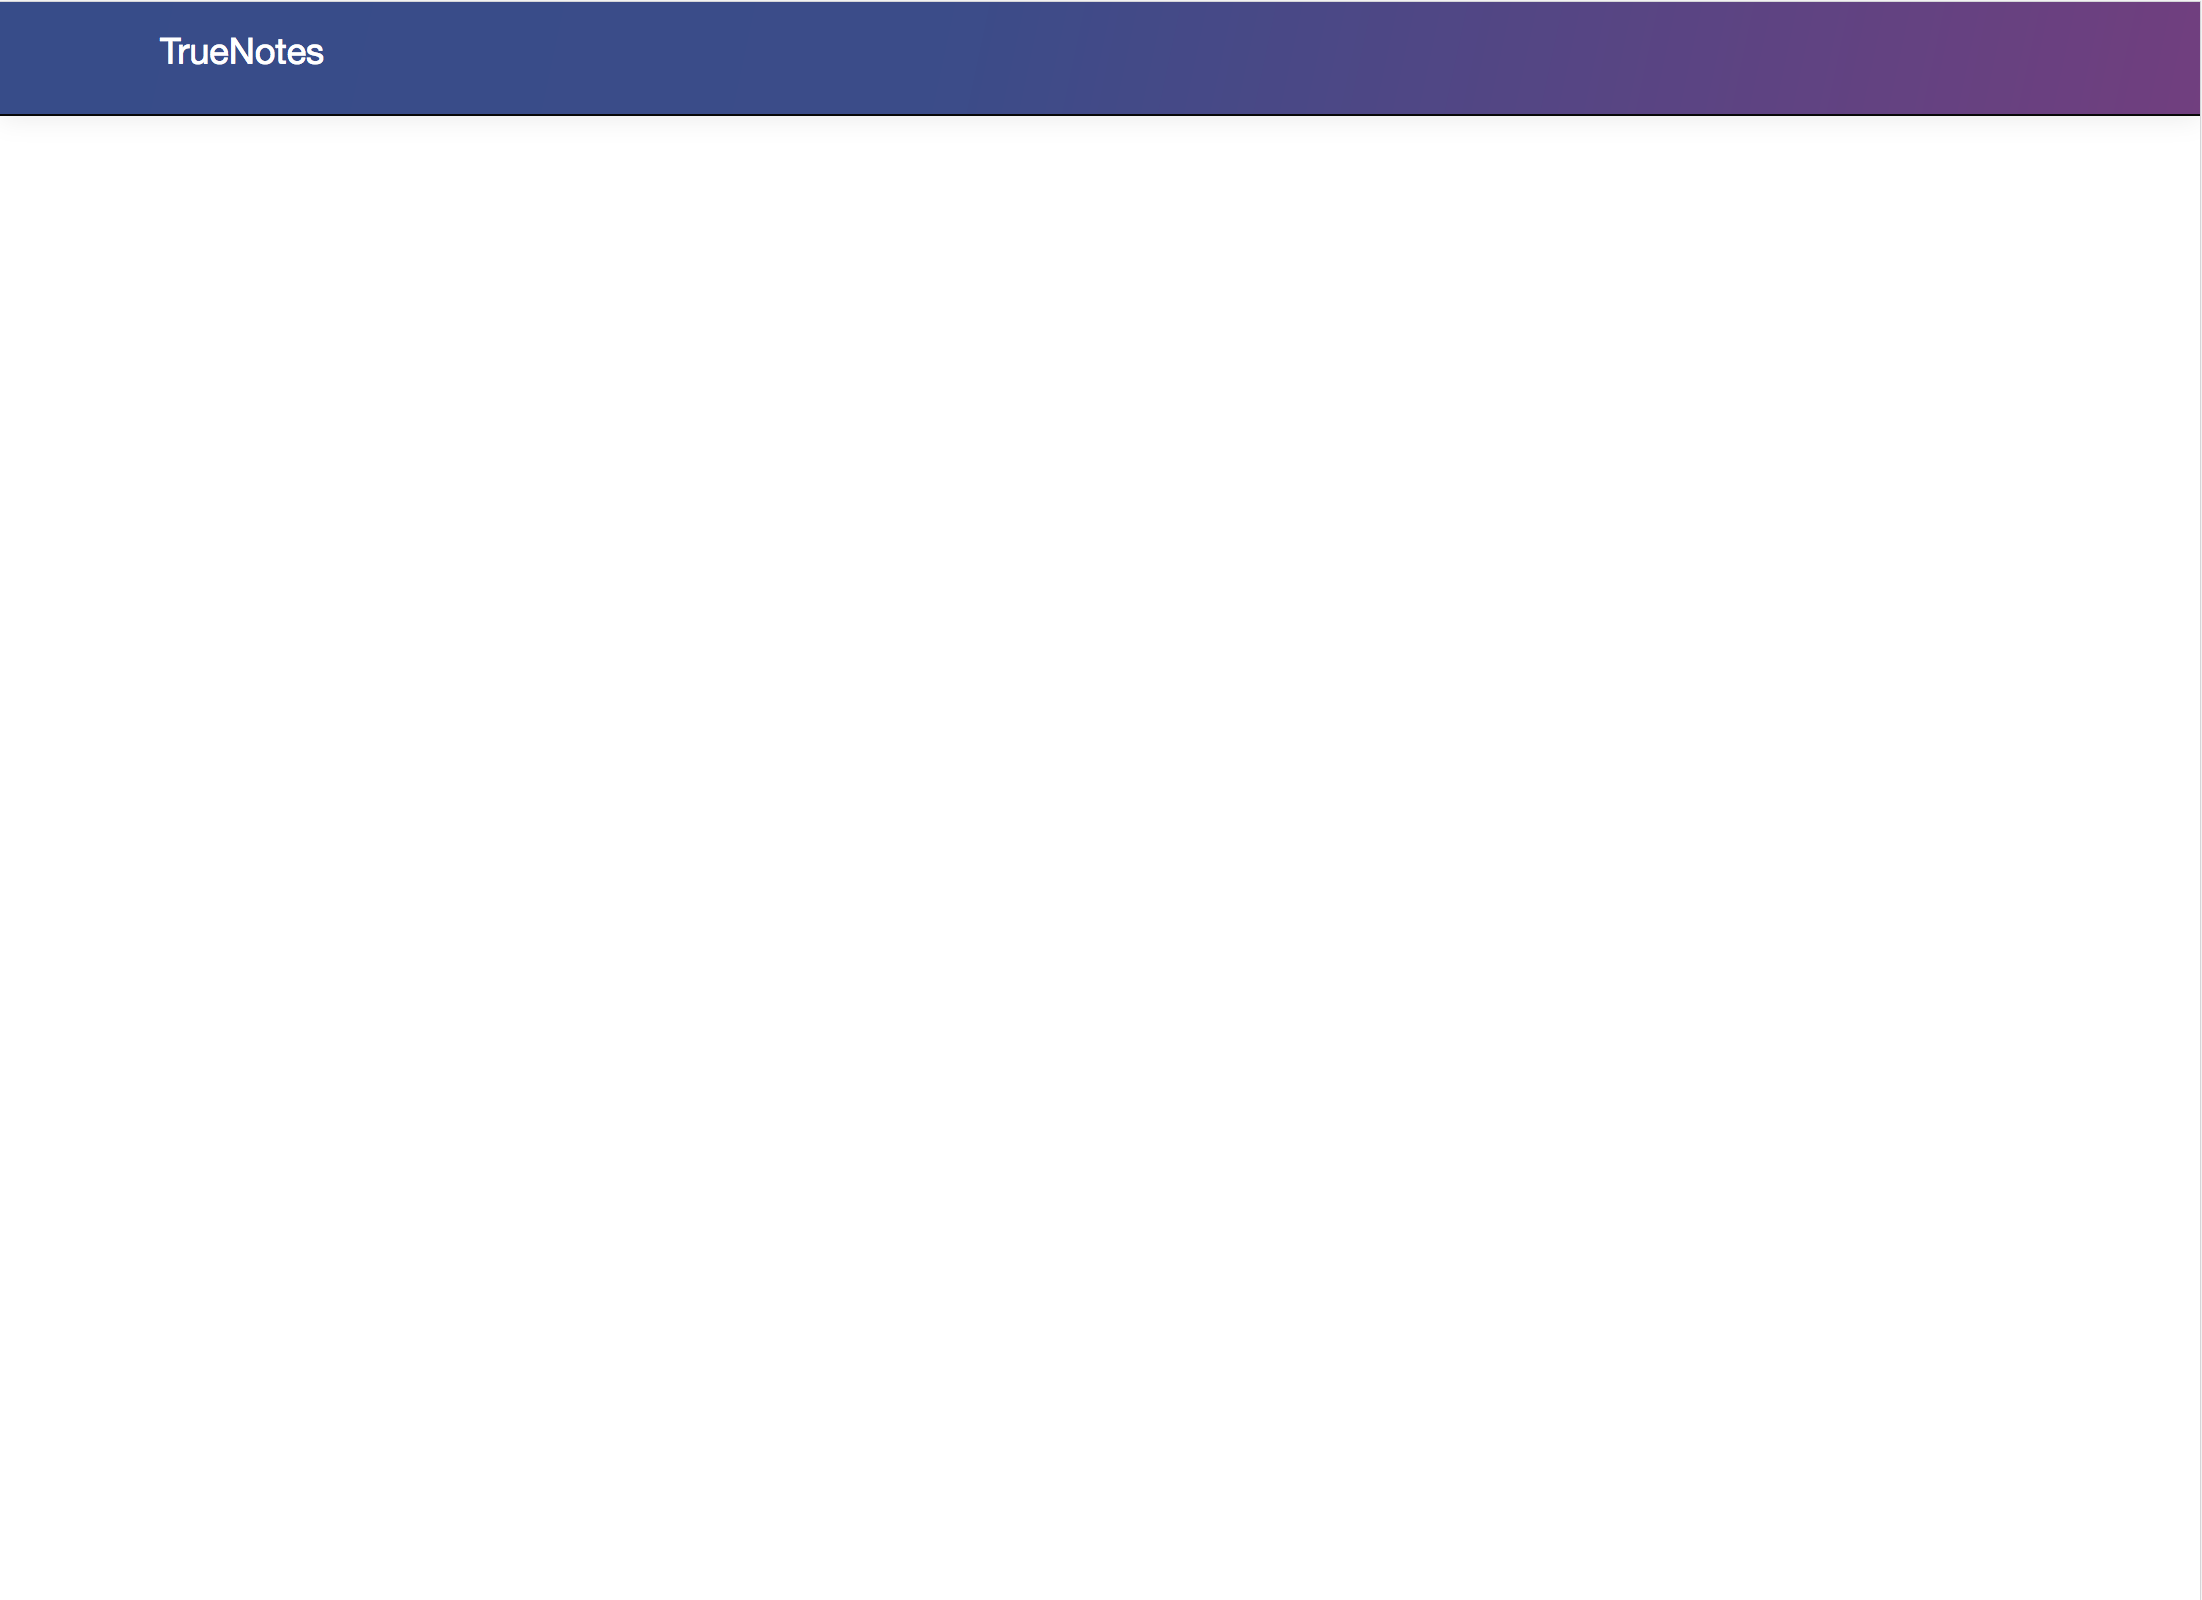
Refreshing the page should now look like this:
.png)
Now let’s make the login button log in the quickstart user in TrueVault. Add this snippet to the index.js file:
const authFormEl = document.getElementById("auth-form");

authFormEl.addEventListener("submit", async e => {
    e.preventDefault();

    const tvClient = await TrueVaultClient.login(TV_ACCOUNT_ID, this.username.value, this.password.value);

    console.log('Auth header:', tvClient.authHeader);
});
If you open the Chrome console and log in with the quickstart user’s credentials, you should see a user access token logged to the console. We will use the tvClient object which saves this user access token to make all subsequent requests to TrueVault for this user.
Adding the notes screen
Now that we can log in with TrueVault, let’s create a screen to land on. Add this to the container div after the auth-form div in index.html:
<button class="btn btn-large" id="add-note">Add a new note</button>
Of course we don’t want to see both the new note button and the login screen at the same time. Most JavaScript MV* frameworks have a way of handling page routing, but for this example we’ll use a bit of pure JavaScript. Replace the contents of index.js with this snippet and refresh the page:
const authFormEl = document.getElementById('auth-form');
const addNoteButtonEl = document.getElementById('add-note');

let tvClient = null;

const setState = async (newState) => {
    authFormEl.style.display = 'none';
    addNoteButtonEl.style.display = 'none';

    switch (newState) {
        case '#notes':
            addNoteButtonEl.style.display = '';
            break;
        case '#login':
        default:
            authFormEl.style.display = '';
            break;
    }
};

authFormEl.addEventListener('submit', async e => {
    e.preventDefault();

    tvClient = await TrueVaultClient.login(TV_ACCOUNT_ID, this.username.value, this.password.value);
    location.hash = '#notes';
});


window.onpopstate = async () => setState(location.hash);

const refreshState = async () => {
    await setState(location.hash);
};

refreshState();
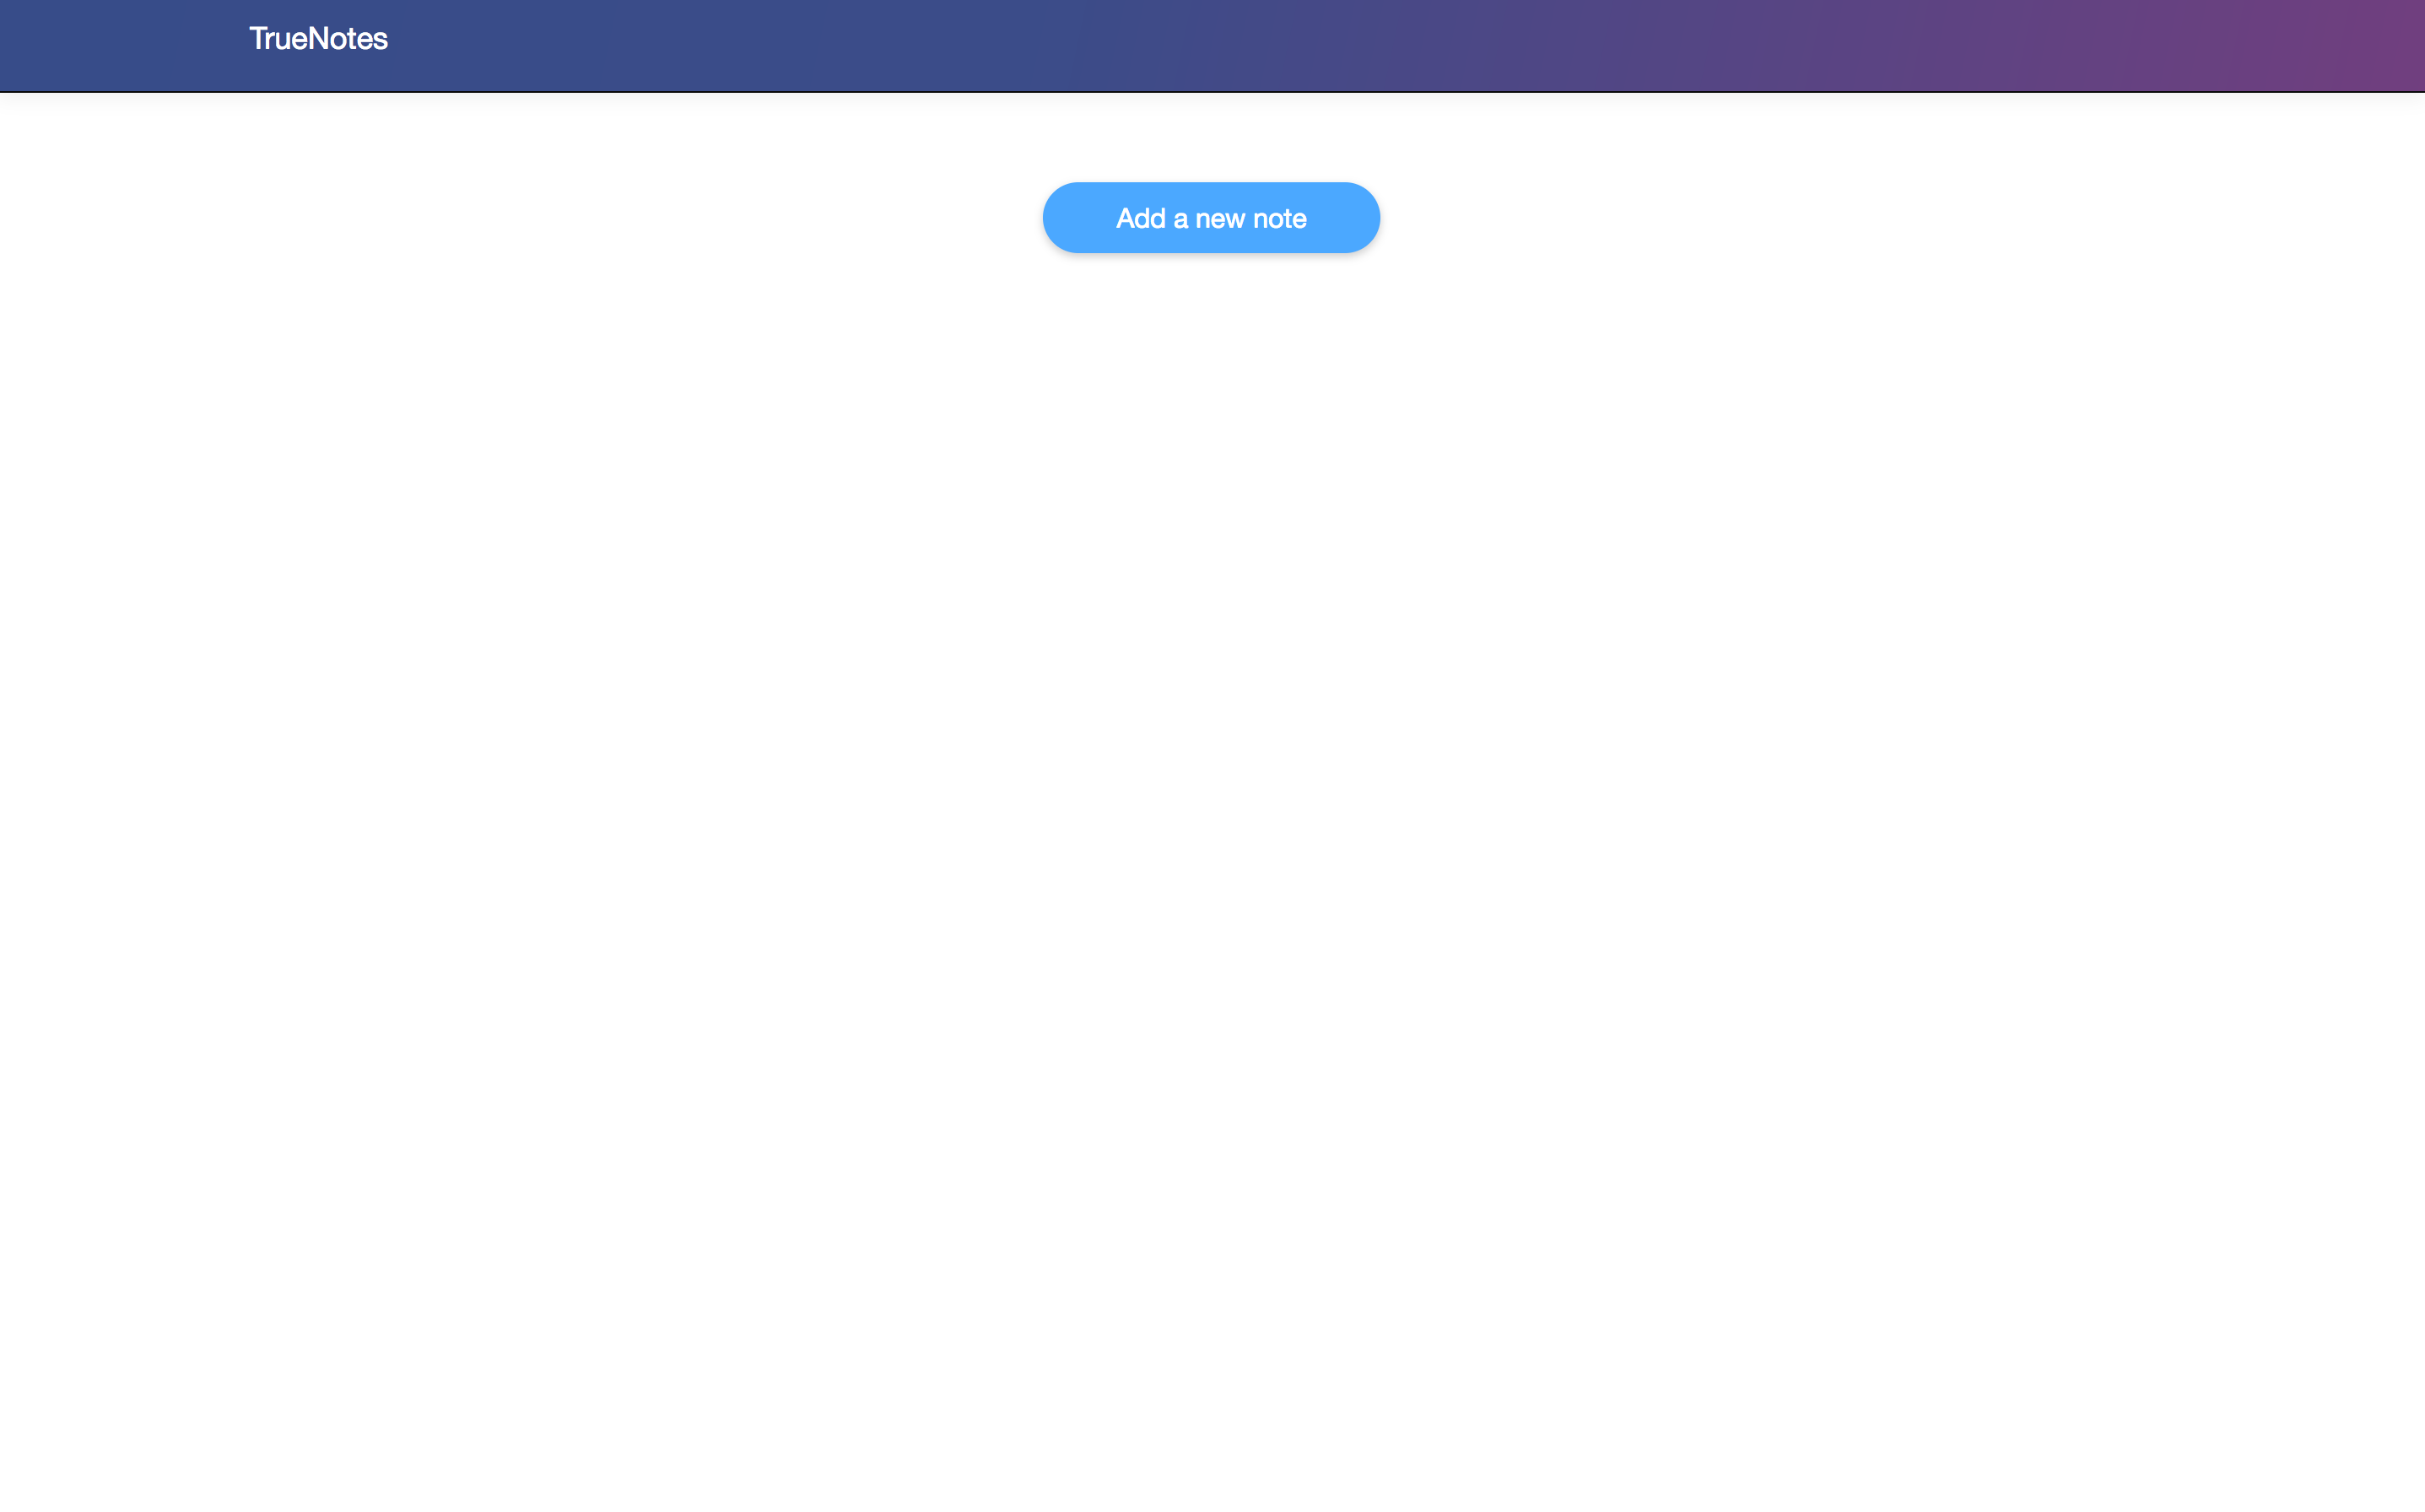
Now when you log in, the login form should be replaced with an “Add a new note” button:
Add note creation screen
Now let’s get the “Add a new note” button to open a note creation module. First let’s add a note creation form to the container div in index.html:
<form id="add-note-form" class="form-horizontal">
  <div class="form-group">
    <label for="note" class="control-label">Note</label>
    <textarea id="note" class="form-control" rows="3" placeholder="Enter note here"></textarea>
  </div>
  <div class="form-group">
    <button type="submit" class="btn btn-default" id="add-note-submit">Add note</button>
  </div>
</form>
And let’s style it by adding this to index.css:
#add-note-form {
    width: 400px;
    margin-left: auto;
    margin-right: auto;
}
Let’s add code to display the note creation module only when we’ve clicked the Add a new note button. Let’s create a reference to the #add-note-form div at the top of index.js:
const addNoteFormEl = document.getElementById('add-note-form');
Let’s also add a new case in setState for the screen to add a note:
const setState = async (newState) => {
    authFormEl.style.display = 'none';
    addNoteButtonEl.style.display = 'none';
    addNoteFormEl.style.display = 'none';

    switch (newState) {
        case '#notes':
            addNoteButtonEl.style.display = '';
            break;
        case '#add-note':
            addNoteFormEl.style.display = '';
            break;
        case '#login':
        default:
            authFormEl.style.display = '';
            break;
    }
};
Finally let’s add an event listener to change the screen when clicking the Add a new note button:
addNoteButtonEl.addEventListener('click', async e => {
    e.preventDefault();

    location.hash = '#add-note';
});
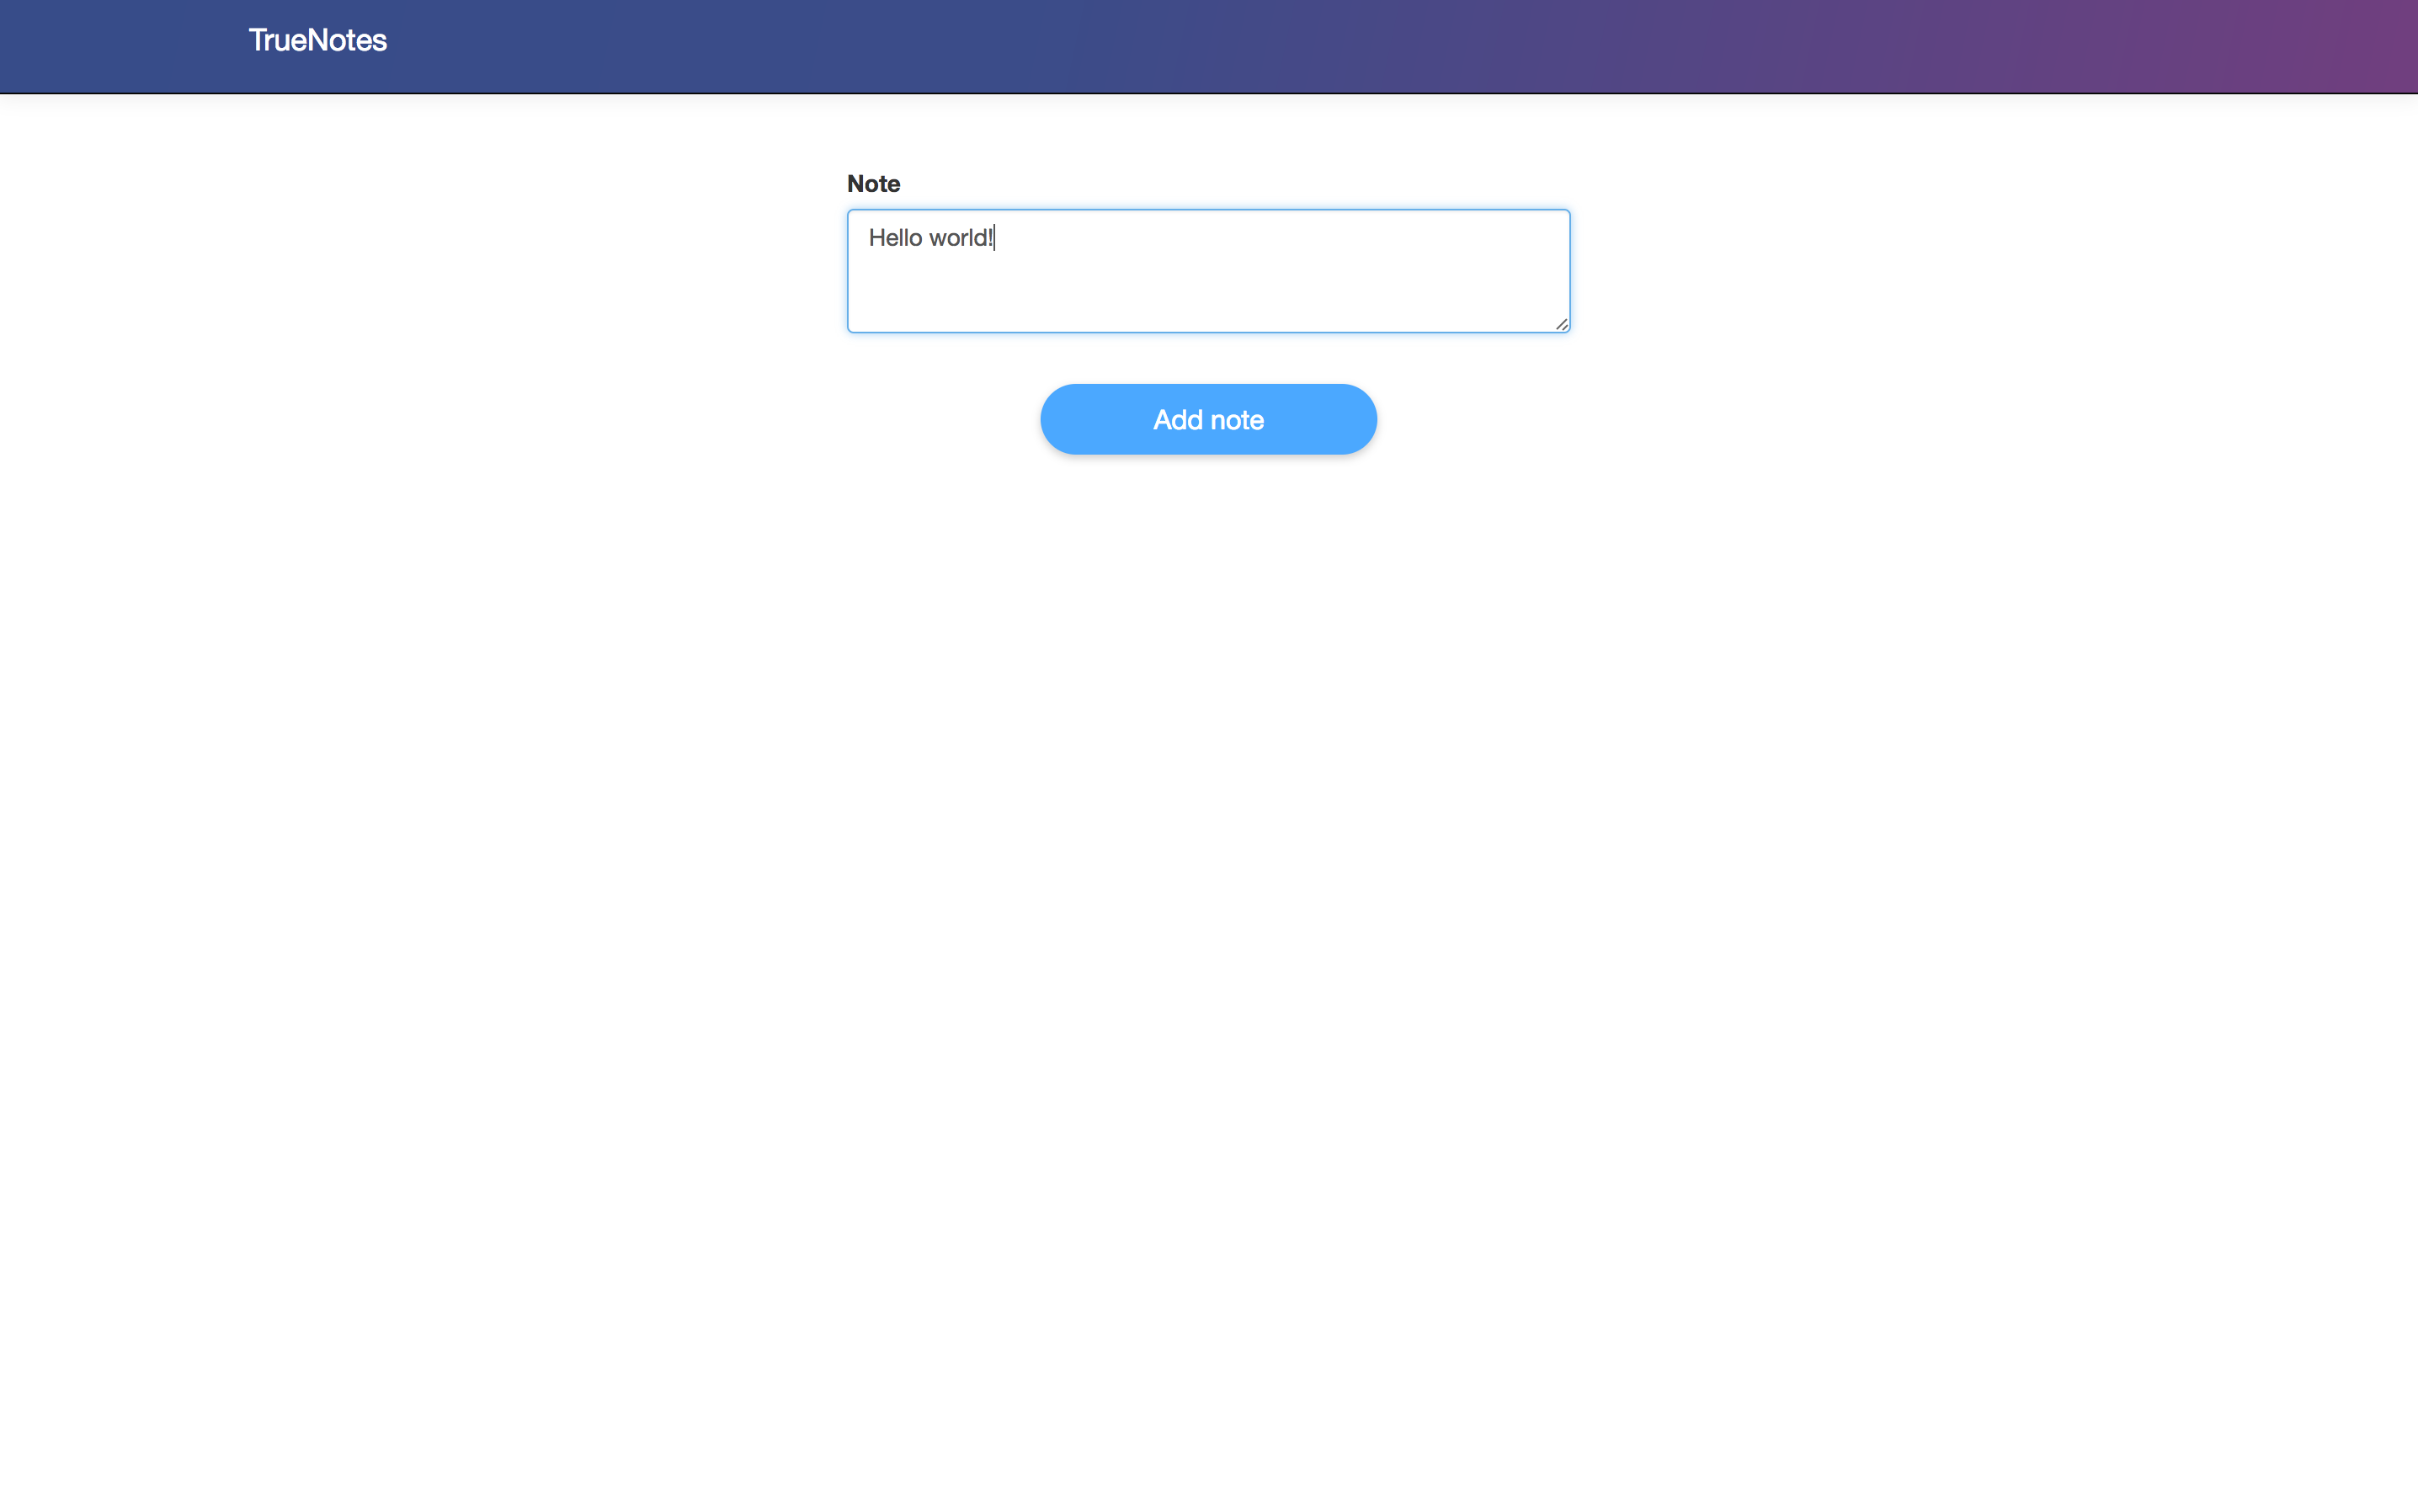
The note creation screen should look like this:
Creating a new note
When we create a new note, we want to store it in the quickstart vault in TrueVault. Let’s add a form submission handler to index.js that does just that.
We need to create a document setting the owner_id to the current user’s in order to be able to list all of their previously stored documents. In order to get the user ID of the current user, we user tvClient.readCurrentUser in the login handler to retrieve the user ID and store it in tvUserId. Update index.js to declare the tvUserId variable and update the authFormEl submit handler as follows:
let tvClient = null;
let tvUserId = null;

...

authFormEl.addEventListener('submit', async e => {
    e.preventDefault();

    tvClient = await TrueVaultClient.login(TV_ACCOUNT_ID, this.username.value, this.password.value);
    const response = await tvClient.readCurrentUser();
    tvUserId = response.id;
    location.hash = '#notes';
});
Now we can add a submit event listener to create a new document:
addNoteFormEl.addEventListener('submit', async e => {
    e.preventDefault();

    const document = {'note': this.note.value};
    await tvClient.createDocument(TV_VAULT_ID, null, document, tvUserId);

    this.note.value = '';
    location.hash = '#notes';
});
The user is able to make themselves the owner of a created document because they have Create permission on Vault::VAULT_ID::Document::$[Owner=self]. If the user tries creating a document with an owner_id other than their own, TrueVault will respond with an error message.
Note: Clear the path and fragment in your browser url (so it just reads localhost:8000) when you reload. The simple state management in this quickstart app isn’t smart enough to redirect you back to login (and you’ll have to login each time you reload).
Viewing the notes
Now that we are able to create a notes in TrueVault, let’s enhance the #notes view by showing all the notes we’ve created. First let’s add a notes-list div to container in index.html:
<div id="notes-list"></div>
And let’s style the notes view:
#notes-list {
    width: 500px;
    margin-right: auto;
    margin-left: auto;
}

.note {
    border: solid #e4e4e4 1px;
    box-shadow: 0 2px 7px 0 rgba(0,0,0,.1);
    padding: 20px;
    margin-bottom: 30px;
}
When we load the #notes view, we need to make a request to TrueVault to list all of the vault’s note documents. Let’s add this TrueVault request to the #notes switch case.
First let’s create a new reference to the #notes-list div:
const notesListEl = document.getElementById('notes-list');
Then let’s modify the #notes case to list the documents in the vault:
const setState = async (newState) => {
    authFormEl.style.display = 'none';
    addNoteButtonEl.style.display = 'none';
    addNoteFormEl.style.display = 'none';
    notesListEl.style.display = 'none';

    switch (newState) {
        case '#notes':
            const response = await tvClient.listDocuments(TV_VAULT_ID, true);
            if (response.items.length > 0) {
                notesListEl.innerHTML = response.items.map(
                    item => `<div >${item.document.note}</div>`
                ).join('');
            }
            notesListEl.style.display = '';
            addNoteButtonEl.style.display = '';
            break;
        case '#add-note':
            addNoteFormEl.style.display = '';
            break;
        case '#login':
        default:
            authFormEl.style.display = '';
            break;
    }
};
We call the document list endpoint from TrueVault and create note divs for each of them. The end user is able to list all the documents they own because they have Read permission on Vault::VAULT_ID::Document::$[Owner=self]. Note that they won’t be able to see any other user’s documents. This is a common example of how you can use TrueVault permissions to prevent users from accessing data they are not supposed to.
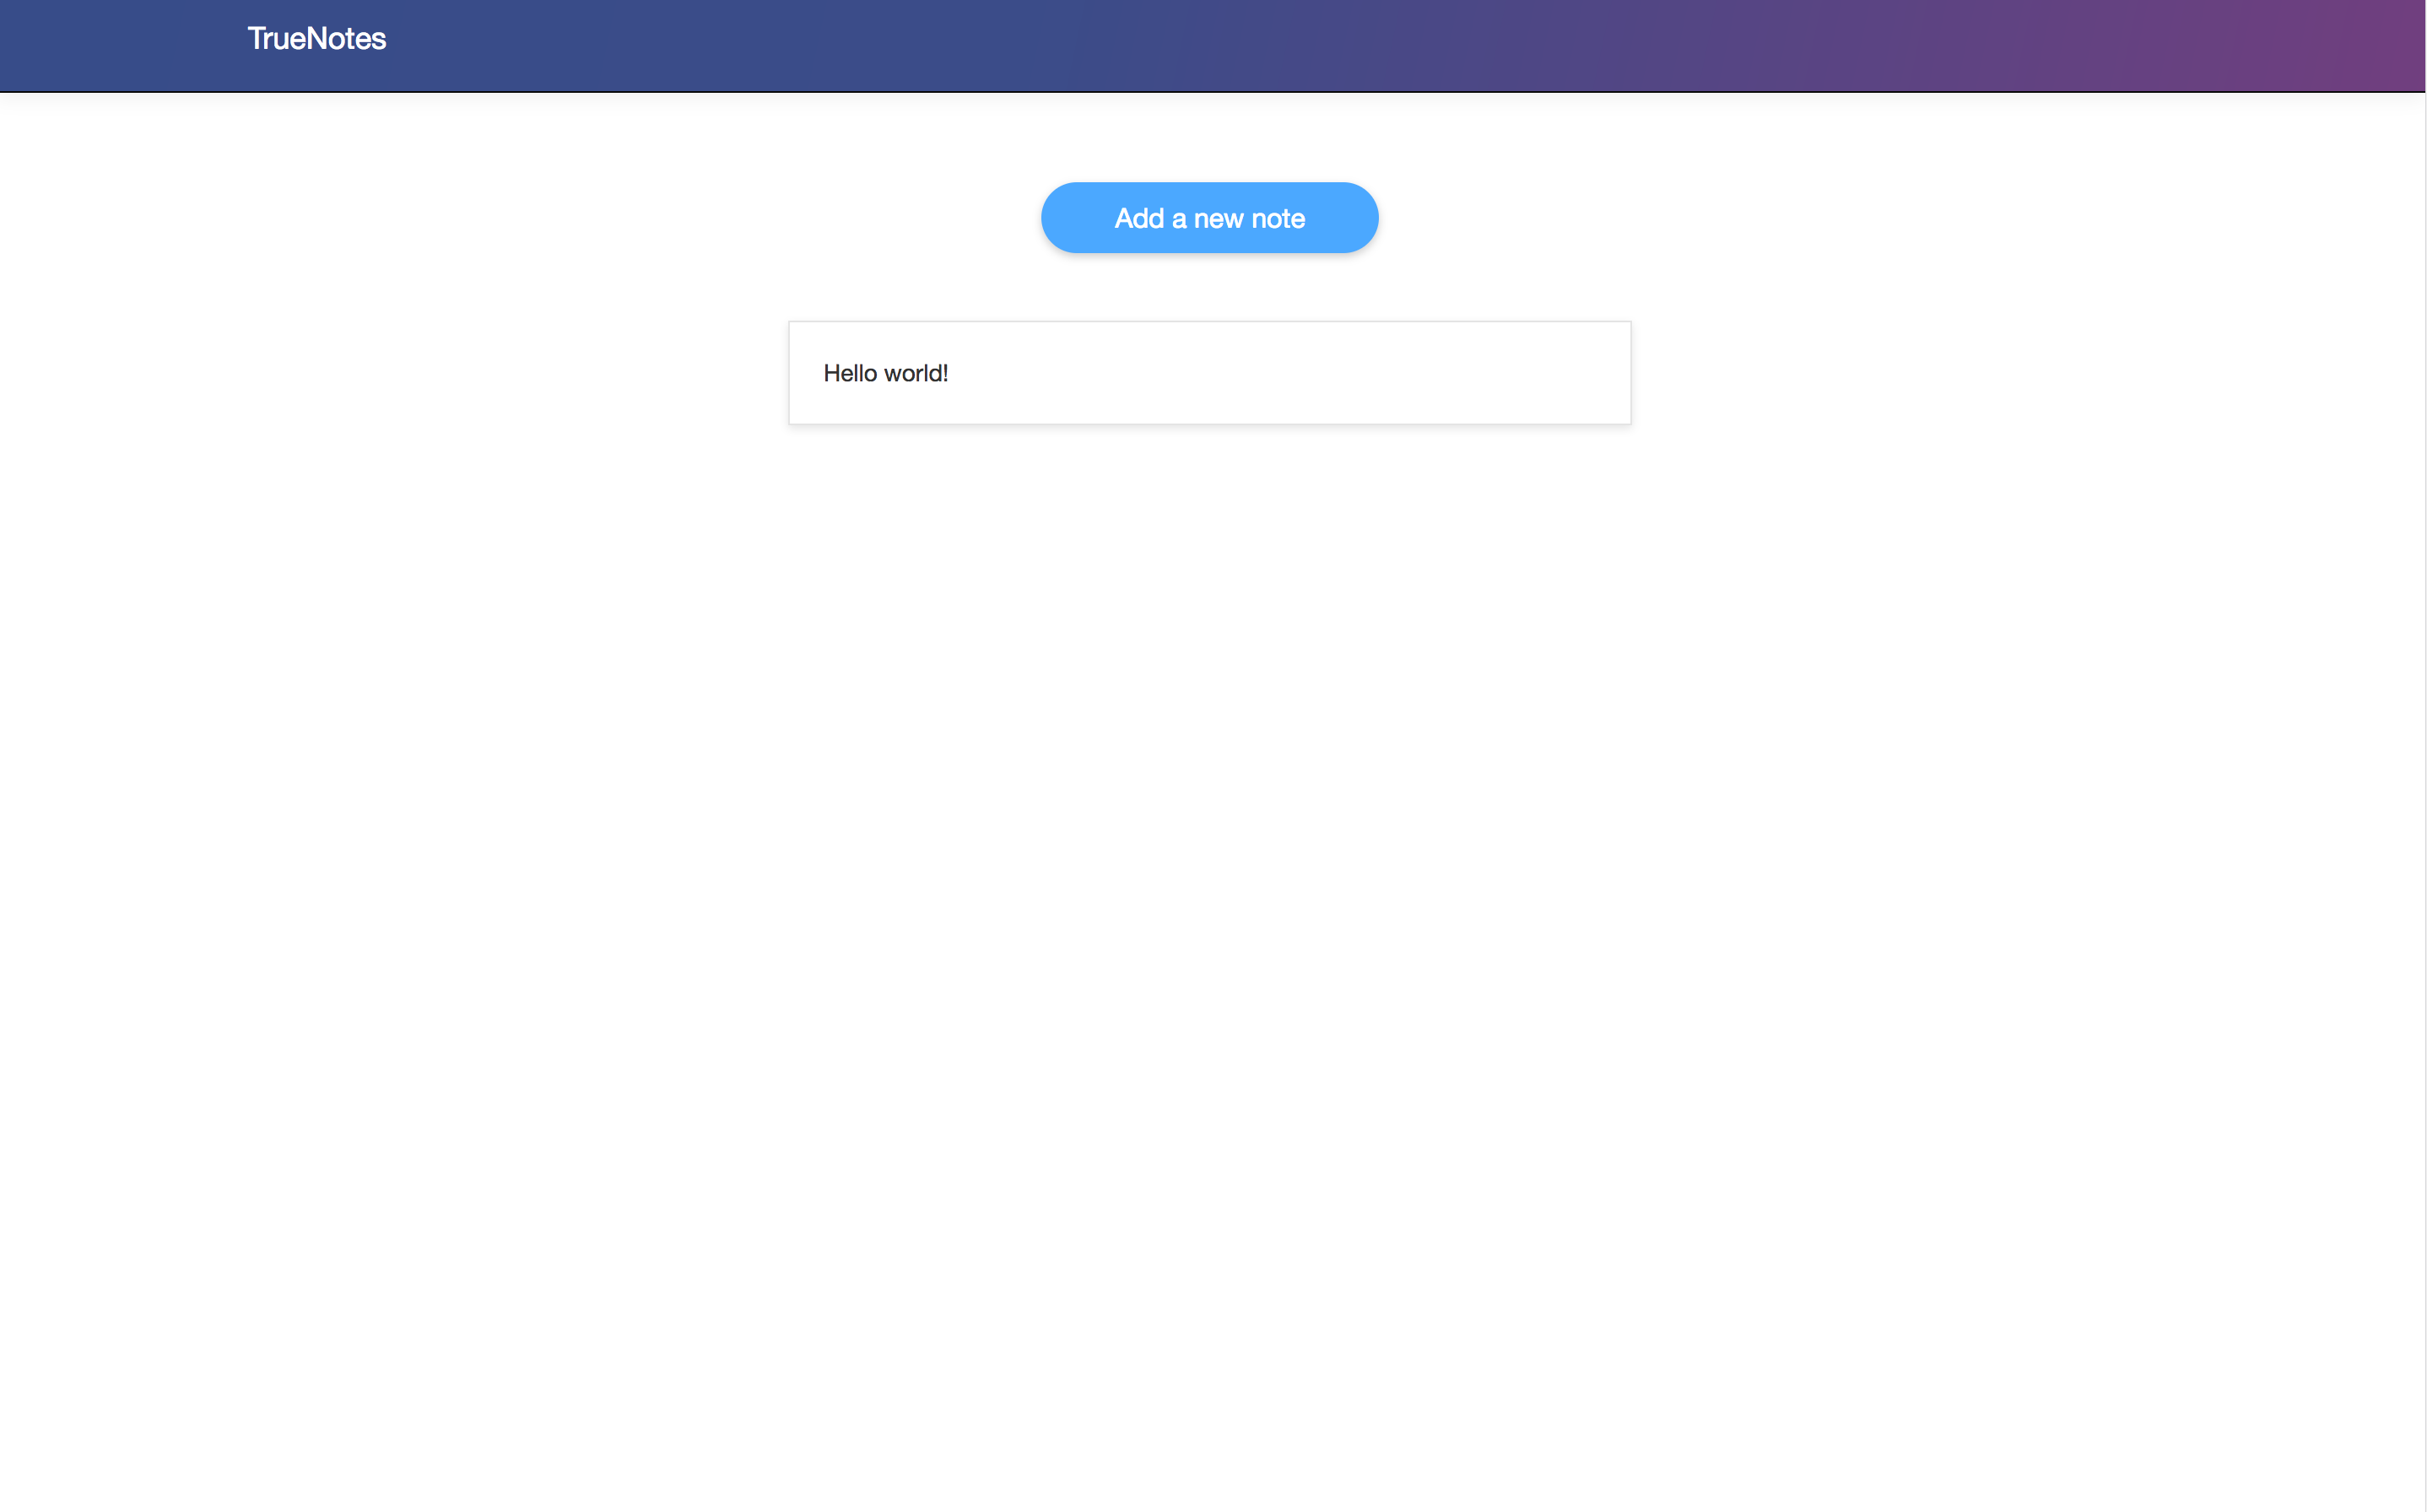
The final notes screen should look like this:
To try out the entire flow of the app, change the url back to localhost:8000 and reload. You should be able to log in and create notes. As a bonus exercise, go back to the TrueVault Management Console and create another user, adding it to the same group. Try logging in as that user. The two users won’t be able to see each other’s notes (even if they requested them by id).
Conclusion
We have completed our first application using TrueVault. It should look the exact same as the master branch of the truevault-quick-start repo we cloned. You can switch back to master by running git checkout master.
By now you should have an understanding of the basics to creating an application using TrueVault. For more a more in-depth example application, check out our more advanced React Sample App which demonstrates a more complex and realistic application architecture. If you would like to learn more about how to build your project using TrueVault, please contact us at help@truevault.com or ask a question on StackOverflow with the tag truevault.