How do I Implement User Forgot Password?
Quick Note: If you’re trying to reset the password on your TrueVault account, you can do so in the management console. The rest of this article describes how to implement a forgot password flow for your end-users.
Overview
If your end-users forget their passwords, you may want to support an email-based password reset flow. TrueVault makes it easy to set this up using a Generator in the management console. Here’s what you’ll need to get started:
- A TrueVault account
- A SendGrid account to use for email delivery
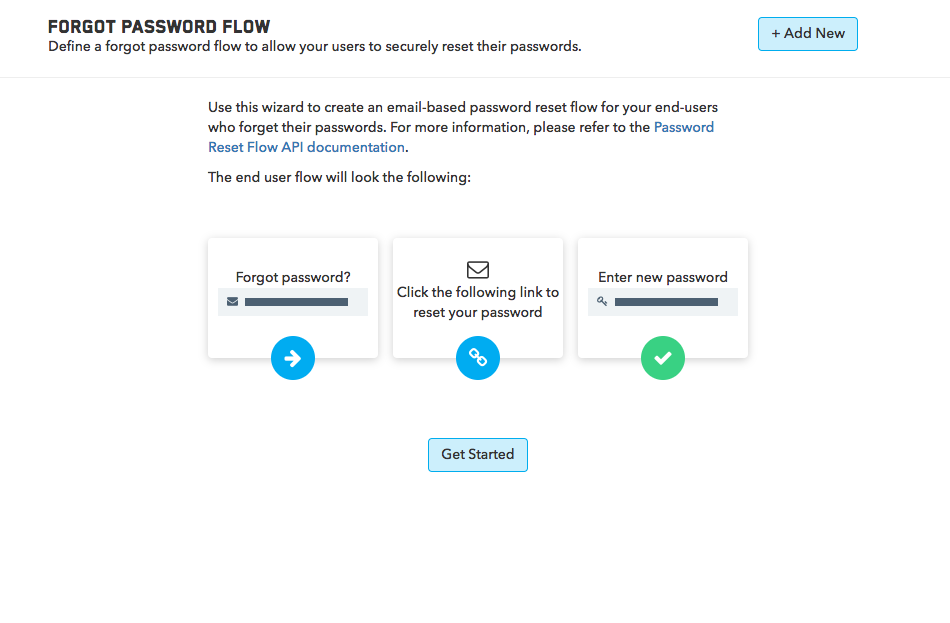
This guide will walk you through how you can use the Forgot Password Flows Generator to configure the forgot password email and generate two code snippets for you: the forgot password form and the reset password form (the one linked to from the forgot password email).
Getting Started
Get started by logging into the management console and clicking on the Generators tab. Select “Forgot Password Flows” from the list to let us help you configure the flow.
First, pick a name for this flow. You may want separate flows for different types of users: one for patients and another for doctors, for example. If you’re not sure yet, just call this “Default Reset Flow”.

Configuring the Email
We’re going to email the user on your behalf to send them their password reset instructions. The next few fields allow you to customize that experience.
From Email Address
First, let us know which email address you want the emails to come from (e.g. support@yourdomain.com).

To Email Address
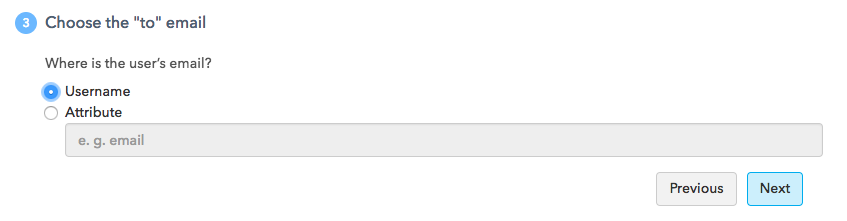
Then, let us know where we can find the user’s email so we know where to send the reset message. If your users always use an email address for their username, you can select the Username radio button.
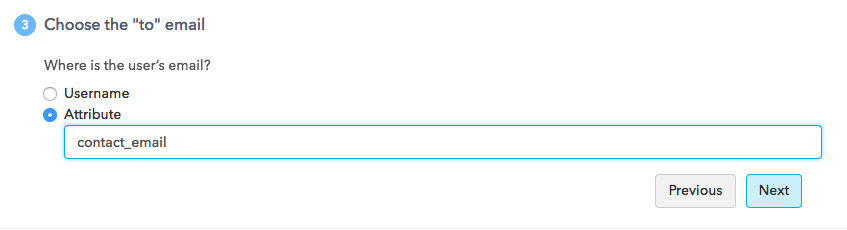
If their email is actually stored in their attributes document, then let us know what the field name is. For example, if your user has attributes like this:
{
   "first_name": "Bob",
   "last_name": "Bobberson",
   "contact_email": "bob@bobberson.ly"
}
Then you would enter “contact_email” in the text field after selecting the Attribute radio button, like so:
Personalize Email Content
You may want to personalize your emails for a better experience. To support this, we allow you to add substitutions. This works in concert with SendGrid’s email substitution functionality in their transaction emails.
Let’s say you just want to include the user’s first and last name in the email template, you may update your template (more on that in a few steps) to include a  and
and  variables like this:
Hello ,

To reset your password, visit...
,
To reset your password, visit...
Since TrueVault stores those values for you, we can send them along to SendGrid when we send the email. All you need to do is add them to the Personalize Email Content step by entering the string you plan to put in the template first (e.g. ) then selecting User Attribute from the dropdown and specifying the field name for that value in your attributes documents (e.g. firstName).
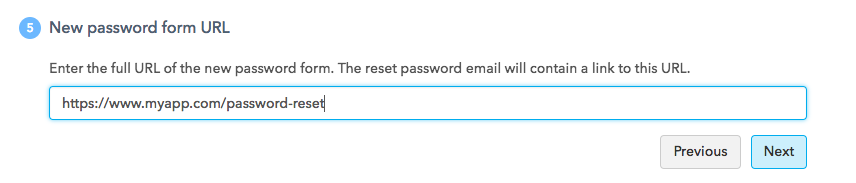
New Password Form URL
In this step, you enter the URL where you will host the reset password form. This is the page the forgot password email will direct users to so they can chose a new password.
Configure Email Sender
Today, SendGrid is the only email partner that TrueVault integrates with. To complete this step, enter an API Key for your SendGrid account. This API Key must be able to:
- Create transactional templates (called Template Engine in the API Key UI).
- Send transactional email (called Mail Send in the API Key UI).
Once you provide this API Key, we will create a template in SendGrid on your behalf and tie it to this Forgot Password Flow. You can then customize the template (e.g. add first name / last name substitutions) in the SendGrid UI directly. After you click “Next”, open up your transactional templates in the SendGrid UI to see what we made for you.
Note: You probably shouldn’t tweak anything in the url, since those are special substitutions we pass along to ensure the user will be able to update their password.
Generated Code
Once you’ve configured this flow, we generate two sample JavaScript and HTML snippets you can use to add the “forgot password” form and the “reset password” form to your application. The first is the form you’ll use to let users request a password reset email. The second is the form you’ll link to from that email that actually allows them to update their password.
You’ll want to copy the output from the generator, since it contains keys and identifiers specific to your account. It will look something like this:
<html>
    <head>
            <script src="https://unpkg.com/truevault@0.5.0/build/index.js"></script>
            <meta charset="utf-8">
    </head>
    <body>
    <form id="reset-form" class="form-horizontal">
        <label for="username">Username</label>
        <input type="text" id="username" name="username" placeholder="joe">
            <button type="submit" id="pw-reset-submit">Send Reset Email</button>
    </form>
    </body>
    <script>
        const resetFormEl = document.getElementById("reset-form");
        const scopedAccessTokenAuth = '...';
        const passwordResetFlowId = '...';

        resetFormEl.addEventListener("submit", async e => {
            e.preventDefault();

            const tvClient = new TrueVaultClient({httpBasic: scopedAccessTokenAuth});

            try {
                await tvClient.sendPasswordResetEmail(passwordResetFlowId, this.username.value);
                alert("Success!");
            } catch(e) {
                alert("Error sending password reset email");
            }
        });
    </script>
</html>
This form uses the TrueVault API to send a password reset email to this user. Note that two pieces of this snippet are unique to you: the passwordResetFlowId and scopedAccessToken. The passwordResetFlowId allows us to retrieve the settings you just configured, and the scopedAccessToken authorizes this request to send an email.
The next snippet should be used on your password reset form. Host this at the URL you specified in step 5 above.
<html>
<head>
    <script src="https://unpkg.com/truevault@0.5.0/build/index.js"></script>
    <meta charset="utf-8">
</head>
<body>
<form id="change-password-form" class="form-horizontal">
    <label for="password">New Password</label>
    <input type="password" id="password" name="password">
    <button type="submit">Update Password</button>
</form>
</body>
<script>
    const resetFormEl = document.getElementById("change-password-form");
    const hashParams = location.hash.substr(1).split('&');
    const parsedParams = {};
    for(var i = 0; i < hashParams.length; i++) {
        const keyValue = hashParams[i].split('=');
        const key = decodeURIComponent(keyValue[0]);
        const value = decodeURIComponent(keyValue[1]);
        parsedParams[key] = value;
    }

    resetFormEl.addEventListener("submit", async e => {
        e.preventDefault();

        const tvClient = new TrueVaultClient({httpBasic: parsedParams.httpAuth});

        try {
            await tvClient.updateUserPassword(parsedParams.userId, this.password.value);
            alert("Success!");
        } catch(e) {
            alert("Error changing password");
        }
    });
</script>
</html>
That’s All!
Once you drop that code in your application, you can start serving forgot password requests automatically.
If you’d like to further customize your template, open up the SendGrid UI and load your Transactional Templates.